How to setup IPTV on
Dreamlink box via DOL2?
Are you looking to unlock the full potential of your streaming device? The Dreamlink T1 and T2 are powerful set-top boxes that grant high-quality access to IPTV channels. However, to enjoy a seamless viewing experience, you must configure the software correctly.
These devices utilize a user interface based on Stalker Middleware. In simple terms, this interface converts online streaming signals into a visual menu, allowing you to easily browse and select the channels you want to watch. The Dreamlink interface is robust, featuring a web browser, video player, and access to various apps.
This guide will walk you through exactly how to setup IPTV on Dreamlink using the dedicated DOL2 (DreamOnline) application.
Prerequisites Before You Start
Before we dive into the setup process, ensure you have the following items ready:
A Dreamlink T1 or T2 box connected to your TV and internet.
The MAC Address of your device (usually found on a sticker on the bottom of the box).
An active subscription from your IPTV service provider.
The Portal URL provided by your IPTV host.
Step-by-Step Guide: Adding Channels to Dreamlink
To load your channels and start streaming, follow these precise steps to configure the DOL2 app.
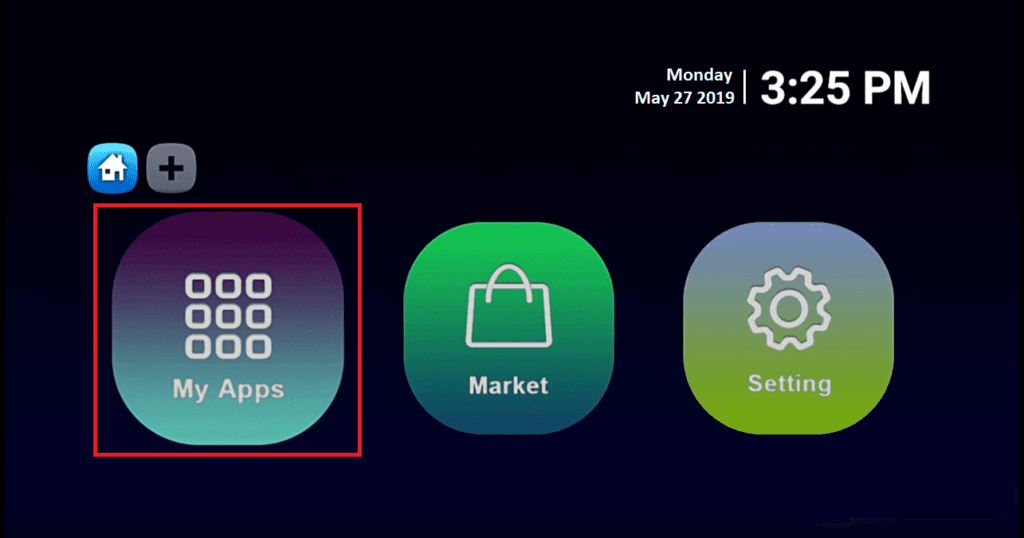
1. Launch the Application From the main dashboard of your device, navigate to “My Apps”.
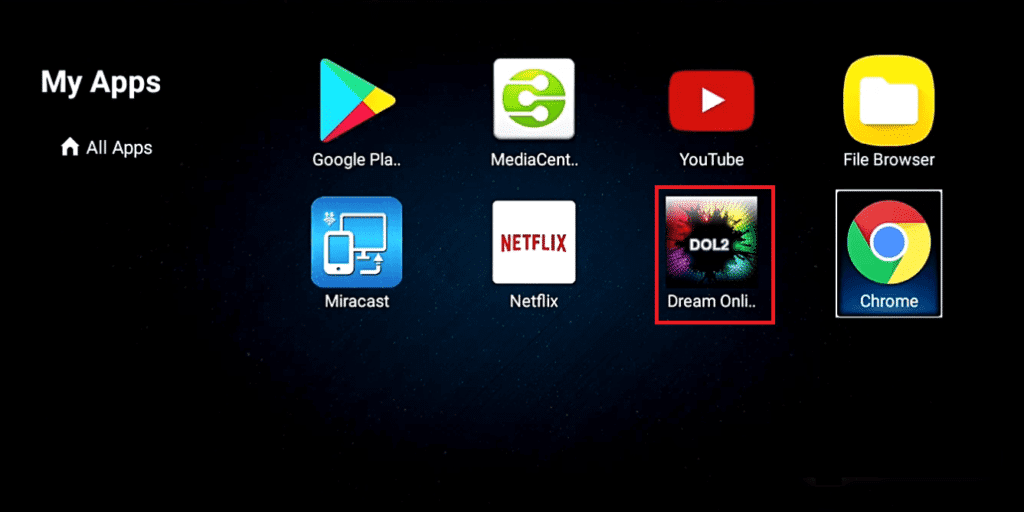
2. Open DreamOnline (DOL 2) Select the DreamOnline (DOL 2) icon.
Note: If you do not see the DOL2 app in the “My Apps” folder, go to the Market folder. Find DreamOnline (DOL2) there, install it, and then return to “My Apps.”
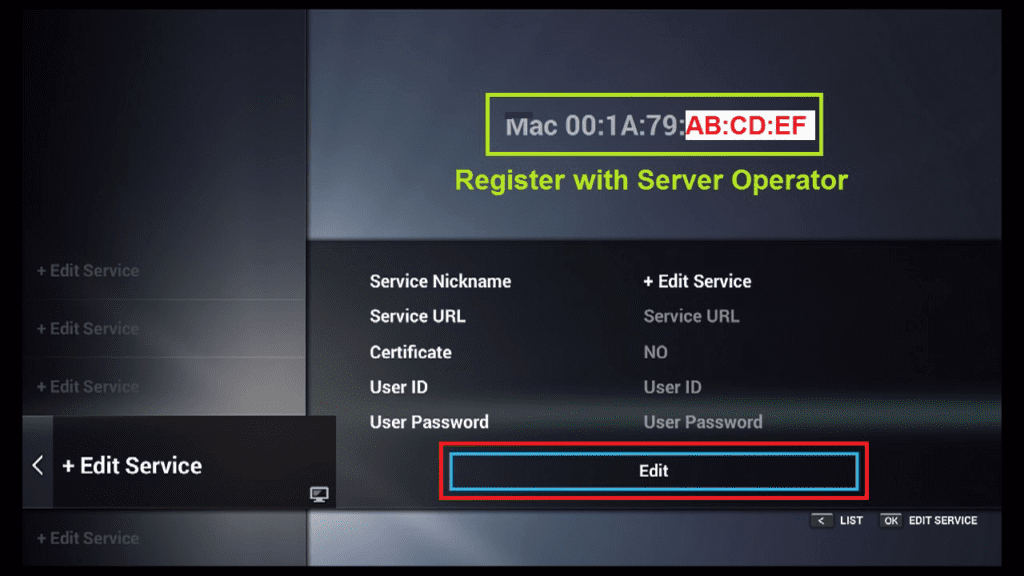
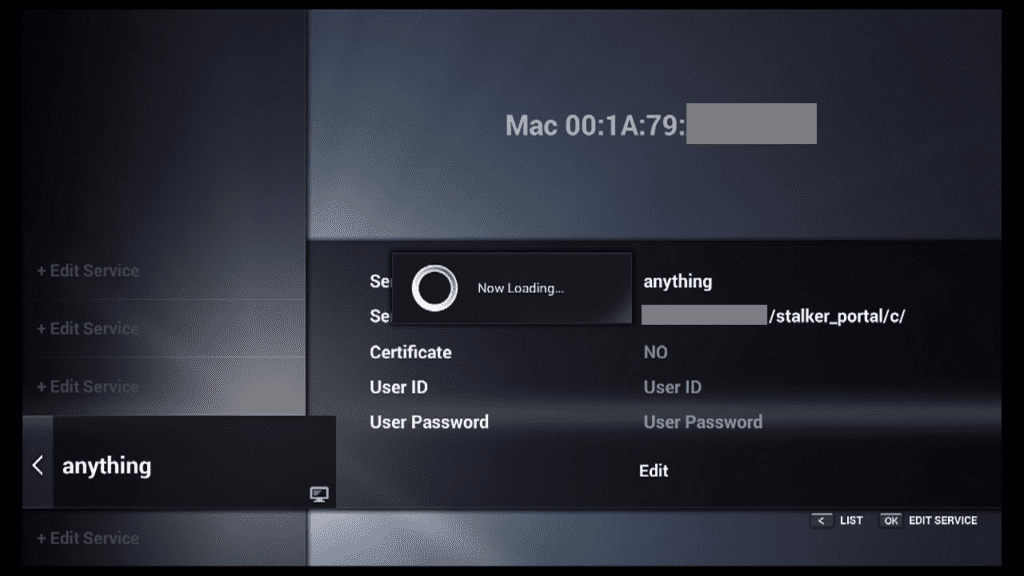
3. Edit Your Service Settings Once the app is open, select “Edit Service” and then click on “Click Edit”.
Important: Ensure you have provided your MAC Address to your IPTV service provider. If they do not have your device’s unique ID, the connection will fail.
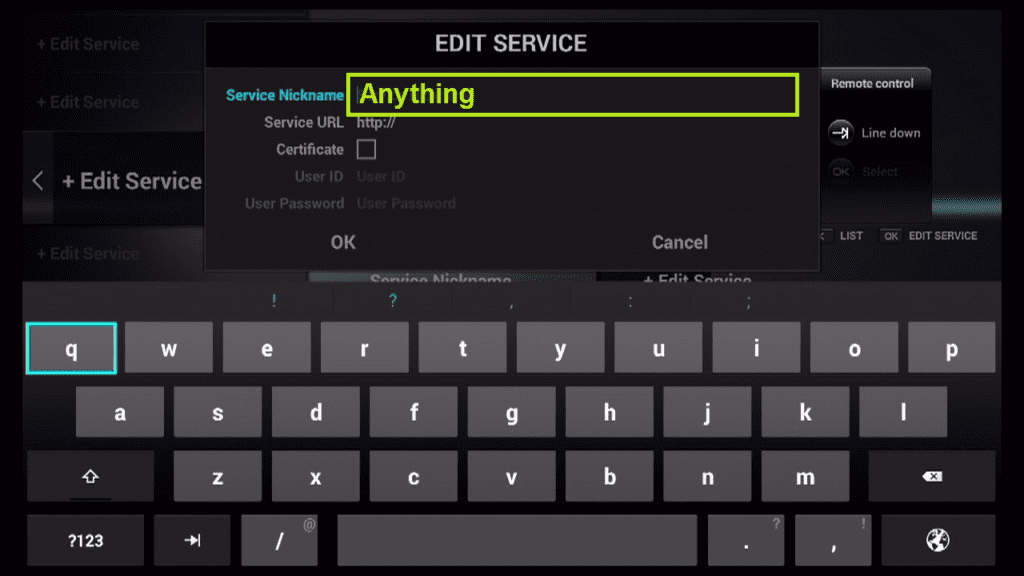
4. Name Your Service In the field labeled Service Nickname, enter any name you like (e.g., “My IPTV” or “Live TV”).
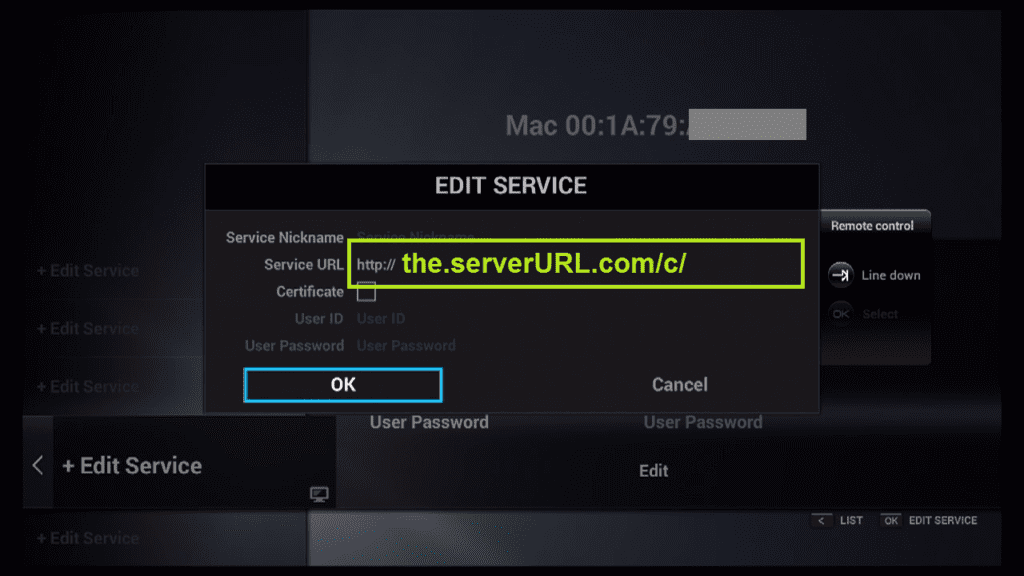
5. Enter the Portal URL Locate the field for IPTV Server URL (sometimes called Portal URL). Enter the address exactly as given to you by your server operator. Double-check for typos.
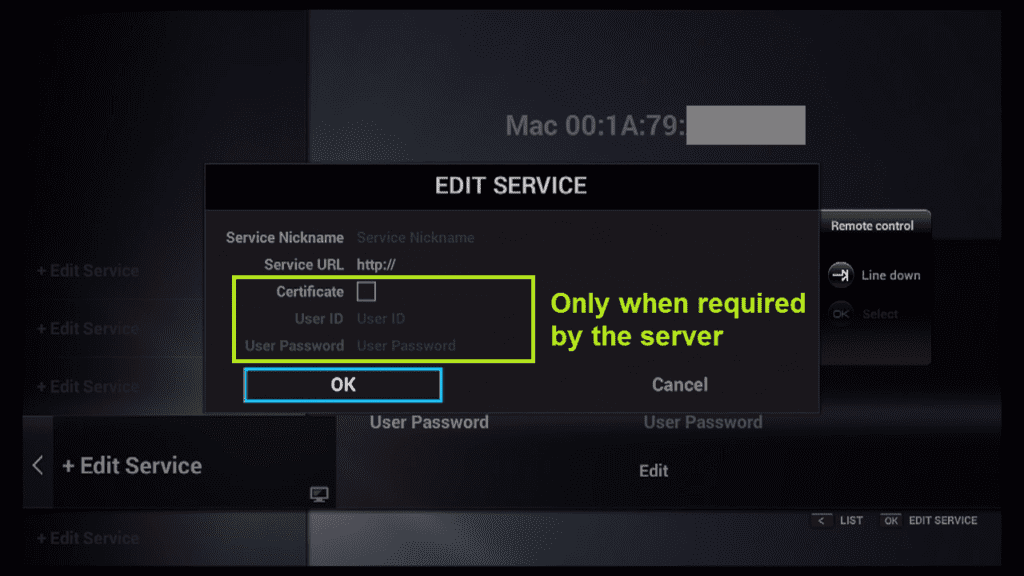
6. Skip User/Pass (Usually) For most Dreamlink setups using MAC activation, it is NOT necessary to enter a Username or Password. You can leave these fields blank unless your provider explicitly tells you otherwise.
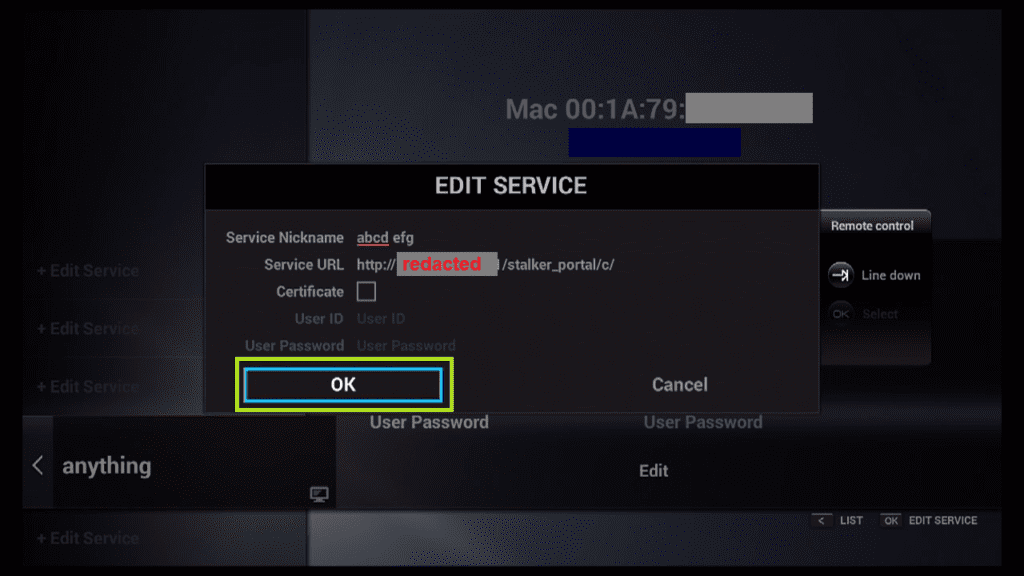
7. Save and Connect Click “OK” to save your settings.
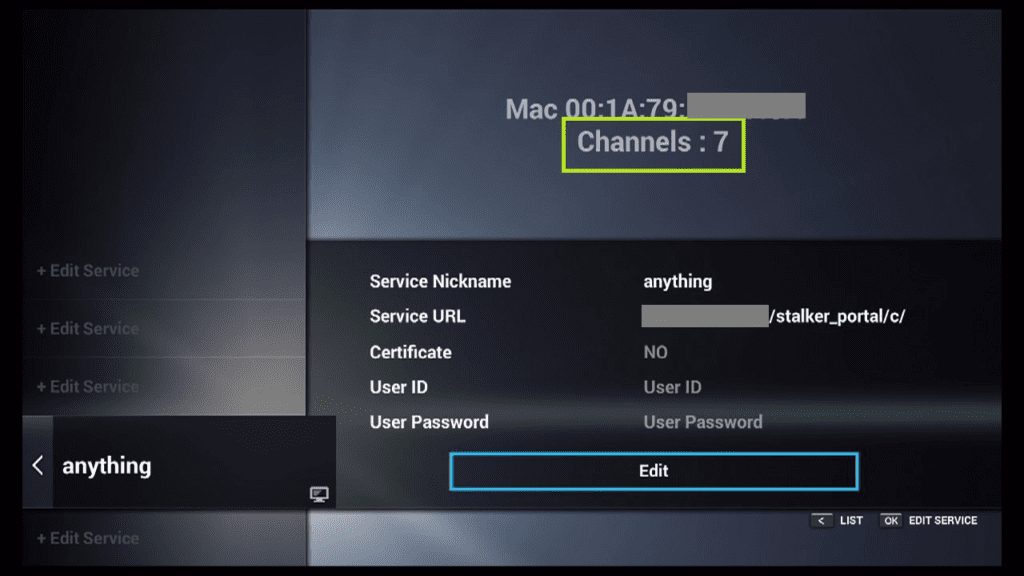
8. Establish Connection The device will now attempt to connect to the server using your registered data. You will see a “Connecting” status bar.
9. Connection Successful Once the loading bar finishes, the connection is established! You should now see the channel list associated with your account.
Troubleshooting Common Dreamlink Issues
If you followed the steps above on how to setup IPTV on Dreamlink but still have issues, check these common solutions:
“Authentication Failed” Error: This usually means your MAC address is not registered. Contact your IPTV provider and ask them to reset your MAC address in their system.
Black Screen: Check your internet connection. Dreamlink boxes require a stable connection (ethernet is recommended over Wi-Fi).
DOL2 App Crashing: Go to the Market folder and ensure you are running the latest version of the DOL2 software.
How to add IPTV channels to Dreamlink
In order to add channels to your dreamlink device, follow the below steps.
Step 1: From the main page, go to “My Apps“.
Step 2: Select DreamOnline (DOL 2).
Note, If the DreamOnline (DOL2) app is not in the My apps folder go to the Market folder, find DreamOnline (DOL2) and install it. After that, it will appear in the My apps folder/
Step 3: Now select “Edit Service” and then click on “Click Edit“.
Important: Be sure you register on (Server Operator Homepage) with your right MAC Address (if necessary).
Step 4: Enter Service Nickname (Any name).
Step 5: Enter the IPTV Server URL (Portal URL) you get from your Server Operator.
Step 6: It is NOT necessary to enter the Username and Password.
Step 7: Click “OK“.
Step 8: Connecting to IPTV Server (with your registered data) in progress.
Step 9: Successful Connection! You receive all channels associated with your account.
Conclusion
Setting up your Dreamlink T1 or T2 is a straightforward process once you understand the DOL2 interface. By following this guide, you can enjoy your favorite IPTV channels in minutes. Remember to always keep your Portal URL safe and ensure your internet connection is stable for the best streaming quality.